How to Connect Brother Printer to Laptop Using WiFi?
Have you tried connecting the brother printer to your laptop, and you failed? Well, it happens when someone is a beginner. It happened to me as well. However, when I practiced the process a few times during my technical training, I gained expertise. Let me introduce myself; I’m a professional who deals with printer-related queries and concerns. With this blog, I want to teach you how to connect Brother printer to laptop using WiFi.

This
is my full-time job, and I write as a hobby. I have helped thousands of people
set up their printers on a compatible device. So, maybe you become one of them.
Let’s understand the procedure. Brother printers are versatile and can be
connected easily with any device.
So,
let’s get started!
Step 1:
Ensure the Compatibility of Your Devices
The
first and foremost thing you must ensure is the compatibility between your
laptop and printer. If they are compatible, you won’t face any problems during
the connection. Otherwise, you’ll try to realize that either of your devices
are not compatible. The best way to learn it is through your printer manual.
Also,
you can visit the brother printer’s official website to learn more about its
compatibility. Once you’re sure that your devices meet the requirements for
setting up with each other, you’re good to go.
Step 2:
Prepare Your Brother Printer Model
While
you’re on the way to learning how to
connect Brother printer to laptop using WiFi, you should configure your
printer well before you get started. This step is crucial for the connection.
Let’s look at the steps for the printer model configuration.
- On your printer, go to the Settings on the Control
Panel.
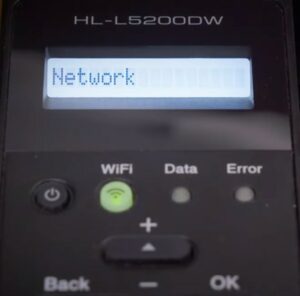
- Then, use the down arrows on the printer to look for the Network and choose your WiFi
network. Finally, press the OK button.

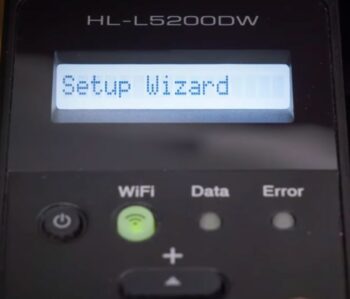
- However, you may need to choose the Setup Wizard to start the connection.

- In the next step, go to the WiFi network and choose your
network.
- Then, hit OK and
supply your password using your printer’s touchscreen.
These
are the complete steps to configure your printer to connect it to a laptop.
Now, let’s check the configuration steps for your laptop.
Step 3:
Prepare Your Laptop
After
configuring the printer, let’s configure your laptop. After this step, your
devices will connect to each other. Check out the steps below.
- First, set up the laptop on WiFi on the same network.
- Then, go to Settings
and choose Devices.

- Under devices, click on the Printers and scanners option.
- After that, choose the
“Add a printer or scanner” option.

- Now, the screen will show the printer’s list.
- Ensure that you connect your laptop to the same network as
your printer.
- Finally, hit the Add
device option to add your printer model name and let the laptop be
configured.
This
is how to connect Brother printer to
laptop using WiFi. Finally, you are ready to print through your printer.
Step 4: Get
Printer Drivers on Your Laptop
When
you’re setting up your printer on a laptop, you need printer software. Hence,
follow these steps to get the necessary printer drivers on your laptop.
Method 1:
Install Driver Software Manually
To
get printer drivers manually, you need to follow these steps.
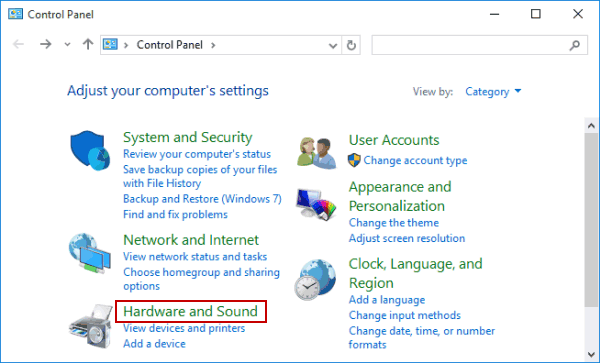
- First, go to the Control
Panel and choose the Hardware
and Sound.

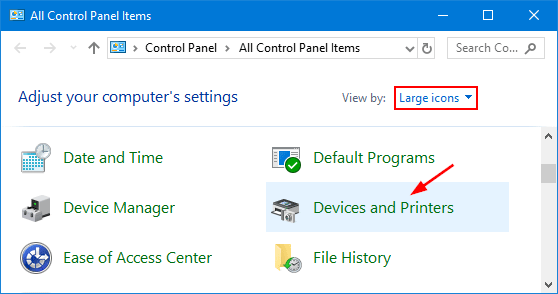
- Under that option, choose the Devices and Printers option.

- Now, select the Advanced
printer setup.
- After that, pick your printer model name and hit Next.
- In the next step, choose “The printer that I want isn’t listed” and hit the Add a printer option.
- Afterward, supply your IP address and your printer model.
- Next, select the printer drivers to install and hit Next.
- Moving forward, click
Continue, and after installation, hit the Finish button.
Finally,
you have printer drivers installed on your laptop, and you can start printing
now.
Method 2:
Install Driver Software from the Website
This
is another method to install the driver software. To follow this method, check
out these steps:
- First of all, visit Brother’s official website on a web
browser.
- Then, head to the Downloads
section.
- Now, enter your printer model number.
- After that, select the correct operating system.
- In the next step, you’ll see a list of available printer
driver packages.
- Select your preferred printer driver package and hit the Download button.
- Also,
let the drivers download and save it under the Downloads folder.
- Visit
your Downloads folder, search for your file, and double-click on it.
- In the next step, let the installation run.
That’s
how you’ll get the necessary printer drivers on your laptop. Now, you are ready
to connect the printer to the laptop to get prints. I hope you understand how to connect Brother printer to laptop
using WiFi.
FAQs
How Do I
Connect a Brother Printer to Windows 10?
There
are different ways to connect a printer to a Windows 10 PC: via USB, Bluetooth,
or WiFi. You can use any of these connections. Also, if you find that your
printer or device isn’t compatible with USB, use an Ethernet cable instead.
Why Should I
Do It if My Brother Printer Isn’t Connecting to WiFi?
If
you feel that your printer is unable to connect to WiFi, follow these
troubleshooting methods:
- Get your printer closer to the WiFi router.
- Review your WiFi network settings.
- Update the printer software and firmware.
How to
Connect Brother Printer to a Mac?
To
connect a printer to your Mac, follow these steps:
- In the first step, disable your printer.
- Then, select a connection type to connect your printer.
- To add the printer, go to the System Preferences on Mac.
- Then, go to the Printers
& Scanners.
- Now, hit the Add
Printer, Scanner, or Fax option.
- When you see your printer in the list, select it.
- Finally, hit the Add
button.


Comments
Post a Comment